Quick Summary
Reformer Pilates can help manage chronic back pain by offering support while you move, controlled range of motion, and gentle strengthening of the core and hips. It is not a cure, but it is one option for building strength alongside guidance from your healthcare team.
• Chronic back pain lasts three months or longer, according to the NINDS low back pain fact sheet.
• Start with pelvic tilts and bridges, and add dead bug and bird dog once those feel steady.
• Stop the exercise if you feel sharp, shooting, or radiating pain, or numbness in a leg or foot.
• Get a medical assessment first if you have leg weakness, bladder or bowel changes, or pain after a fall.
Table of Contents
• Reformer Pilates for Chronic Back Pain: How It Can Help
• Who Should Get a Medical Assessment Before Starting
• Reformer Pilates Exercises for Lower Back Pain
◦ Warm-up: Pelvic Tilts and Imprinting
◦ Bridges and Hip Hinge Movement
◦ Core Stabilization: Dead Bug and Bird Dog
• Pilates Exercises to Avoid with Lower Back Pain
◦ Regress, Hold, Progress, or Stop: A Symptom-Based Decision Guide
◦ Soreness Versus a Warning Sign
◦ Movements to Modify Rather Than Avoid
• Setting Up the Reformer and Adjusting Resistance Safely
• How Often to Do Pilates for Back Pain: A Four-Week Plan
◦ What a Session Should Look Like
◦ Progression Checkpoints
◦ Frequency and Recovery
◦ What the Evidence Does and Does Not Show
• Booking Your First Reformer Session at FLX FLO
Reformer Pilates for Chronic Back Pain: How It Can Help
Chronic back pain is pain that lasts for three months or longer, according to the National Institute of Neurological Disorders and Stroke low back pain fact sheet. It can make even simple movement feel risky. Many people stop moving because they fear making the pain worse, and that inactivity often leads to stiffness and weaker supporting muscles.
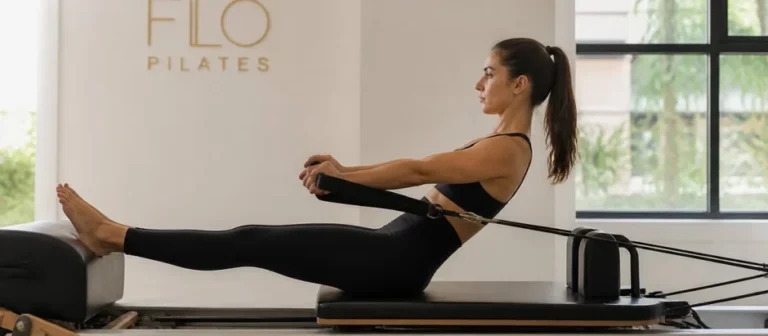
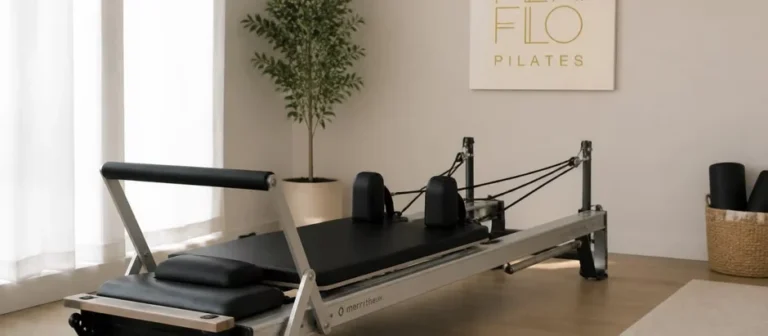
Reformer Pilates uses a sliding carriage, springs, and straps to support movement. Some people find this makes it easier to build core control and hip strength than on a mat.
Here is what reformer work can offer people with back pain:
• Support while you move: The carriage and springs reduce how much your back has to hold up.
• Controlled range of motion: You can move within a comfortable range and increase it over time.
• Core and hip strength: Gentle, repeated work can build the muscles that support your spine.
Reformer Pilates is not a cure. It is one option for managing symptoms and building strength alongside guidance from your healthcare team.
Who Should Get a Medical Assessment Before Starting
Some back symptoms need a professional evaluation before any exercise program. Talk with a doctor, physical therapist, or other qualified clinician before starting if any of these apply to you:
• Pain that started after a fall, car accident, or other injury
• Numbness, tingling, or weakness in your legs or feet
• Loss of bladder or bowel control
A clinician can tell you which movements are safe for your condition, so bring a list of exercises you are considering to review together.
Reformer Pilates Exercises for Lower Back Pain
Start slowly. Your first sessions are for learning the movements, not pushing through pain. Keep each exercise small and controlled, and stop if sharp pain appears.
Woman in her fifties performing a bridge on a reformer pilates machine with an instructor monitoring her form
Warm-up: Pelvic Tilts and Imprinting
Pelvic tilts gently wake up the lower back and abdominal muscles. Lie on your back on the reformer with your knees bent and feet on the footbar.
Imprinting is a related movement: gently press your lower back toward the mat and hold for a few breaths, which helps many people feel more in control of their pelvis before harder work.
Bridges and Hip Hinge Movement
Glute bridges build hip and back strength. Lie on the carriage with your feet on the footbar and lift your hips in a slow, controlled way. Lower with the same care.
The hip hinge teaches you to bend from the hips rather than the lower back. This matters for everyday tasks like lifting a laundry basket or picking something up off the floor.
Core Stabilization: Dead Bug and Bird Dog
Core stability helps your spine stay supported during daily movement. Two common exercises build this skill:
• Dead bug: Lie on your back with arms reaching up and knees bent over your hips. Slowly extend one leg and the opposite arm, keeping your lower back gently pressed down.
• Bird dog: On hands and knees, extend one arm and the opposite leg, keeping your hips level and spine still.
Watch out: If your lower back arches or sags during these moves, shorten the range until you can hold a steady position.
Pilates Exercises to Avoid with Lower Back Pain
Some movements put heavy stress on a sore lower back. Avoid these, or ask your instructor for modified versions, especially when pain is active:
Pilates Reformer | All Levels | Pilates for Low Back Pain
HolisticMovementPilates
• Deep, fast spinal flexion such as rolling up quickly from a supine position
• Heavy spring loads that force your back to work too hard
• Full-range twisting while sitting or standing
That list is a starting point, not a complete rulebook. The more useful skill is reading your symptoms during and after a session and responding with a clear decision: regress, hold, progress, or stop.
Regress, Hold, Progress, or Stop: A Symptom-Based Decision Guide
Use the same four responses every time you exercise so you are not guessing in the moment.
Regress when pain rises above a mild, familiar level during the movement, when you cannot keep your ribs and pelvis stacked, or when you notice yourself gripping, holding your breath, or bracing hard to finish a repetition. Practical regressions:
• Shorten the range of motion, for example, lift the hips only halfway in a bridge instead of to full extension.
• Reduce spring resistance by one setting so the carriage moves more easily and you can control it.
• Reduce leverage, keep the knees more bent in a dead bug, or slide the heel along the carriage instead of extending the leg fully.
Hold when the movement feels clean and pain stays at its usual baseline.
Progress only when all three are true: you finished the previous session without a flare lasting more than a day, you can complete the current dose with steady alignment and normal breathing, and your pain has not increased from baseline over the past week. Progress one variable at a time, range, resistance, repetitions, or complexity, never several at once.
Stop the exercise and end the session when you feel sharp, shooting, or radiating pain; numbness or tingling in a leg or foot; sudden weakness; or dizziness. These are not signals to push through.
Book Class →
Soreness Versus a Warning Sign
Mild muscle soreness after a session is common. It usually shows up in the muscles you worked, feels like a dull ache, and eases within 24 to 48 hours. A warning sign looks different: (Source: guidelines for managing chronic low back pain)
• Pain that is sharp, shooting, or travels down a leg
• Numbness, tingling, or weakness in a leg or foot
• Pain that wakes you at night or is worse at rest
If you notice any warning sign, stop the program and contact a clinician. Do not try to diagnose yourself from an exercise guide.
Watch Out These decision rules are general education, not a substitute for an individualized assessment. If your symptoms are new, worsening, or include any red flag, get evaluated before continuing.
Movements to Modify Rather Than Avoid
Some classic Reformer exercises are not off-limits, they just need a different setup when the back is sensitive:
• Roll-up and spinal articulation: Replace fast rolling with a supported pelvic tilt and small segmental curl, or do the movement with the head and shoulders only.
• Twisting: Reduce the range and keep the twist in the upper back rather than the lower back; avoid loaded twisting while seated.
• Extension-heavy work: Limit end-range back extension and keep the ribs stacked over the pelvis.
A good instructor will help you swap a movement rather than skip the whole session. The goal is to keep moving at a level your back can tolerate, not to avoid movement altogether.
Setting Up the Reformer and Adjusting Resistance Safely
Setup matters as much as the exercise itself. Before each session, ask your instructor to check:
• Footbar position: Your feet should rest comfortably without straining your ankles or knees.
• Shoulder position: Keep your shoulders relaxed and away from your ears.
• Spring resistance: Start with the lightest springs that still let you feel the muscles working.
Resistance should feel challenging but manageable. If you are gripping, holding your breath, or losing alignment, lighten the load.
How Often to Do Pilates for Back Pain: A Four-Week Plan
Consistency tends to matter more than intensity. A simple starting structure looks like this:
Week | Sessions per Week | Focus | Session Length
1 | 2 | Pelvic tilts, bridges, gentle warm-up | 30 to 45 minutes
2 | 2 to 3 | Add dead bug and bird dog | 30 to 45 minutes
3 | 3 | Increase range and spring control | 45 minutes
4 | 2 to 3 | Review progress, adjust with your instructor | 45 minutes
That table is a skeleton. The details below turn it into a plan you can follow, with checkpoints for when to move forward and when to stay put.
What a Session Should Look Like
A cautious beginner session has four parts:
1. Setup and breathing (3 to 5 minutes): Adjust the footbar, headrest, and springs before you lie down. Take a few slow breaths with the ribs expanding and the lower back relaxed on the carriage.
2. Warm-up (5 to 8 minutes): Pelvic tilts, imprinting, and gentle footwork with light springs.
3. Main work (15 to 25 minutes): Two or three exercises from the bridge, hip hinge, dead bug, and bird dog family, done with controlled tempo.
4. Cool-down (3 to 5 minutes): Slow breathing, gentle stretching, and a moment to note how the back feels before you get up.
Keep the total session within the length in the table. Longer is not better when the back is sensitive.
Progression Checkpoints
Use these checkpoints at the end of each week rather than pushing forward on a good day:
• End of week 1: You can complete pelvic tilts and bridges with steady breathing and no flare lasting more than a day. If not, repeat week 1.
• End of week 2: You can add dead bug and bird dog without the lower back arching or the hips rocking. If not, keep the range small and repeat week 2.
• End of week 3: You can complete a full session at the current spring setting with normal breathing and no increase in baseline pain. If not, hold the dose and repeat week 3.
Spending two to three weeks at the same dose before advancing is common and is not a lack of progress; it is how the tissues adapt.
Frequency and Recovery
Two sessions per week is a reasonable start for most people with chronic back pain. Leave at least one rest day between sessions to judge how the back responded; light walking or gentle mobility on off days is usually fine, but save the Reformer work for scheduled sessions.
If a session leaves you sore for more than a day, reduce the next session’s volume by about half and rebuild. Do not add sessions to make up for a flare.
What the Evidence Does and Does Not Show
Exercise therapy is commonly recommended as a reasonable option for chronic low back pain, and Pilates is one form of it. Research on Reformer Pilates specifically is limited, and results depend on the protocol used.
A realistic expectation: many people report less pain and better function after several weeks of consistent practice, but results vary, and the benefit likely comes from regular, graded movement and strength rather than the Reformer machine itself.
Key Takeaway Treat the four-week plan as a template, not a race. Hold each stage until the checkpoint is met, progress one variable at a time, and judge success by whether you can keep moving consistently, not by how fast you advance.
Booking Your First Reformer Session at FLX FLO
A first visit should feel low pressure. You can review current options on the FLX FLO Pilates pricing page before you book.
Before you book, check the class schedule for a time that works and reserve your first session.
Tell your instructor about your back pain before class starts so they can help you adjust the setup and exercises. You can also read more about reformer Pilates for desk workers if long hours at a desk are part of your back pain story.